Chain Link Tutorial
How to quickly create a 3D Chain Link using Cinema 4D
If you need to quickly make a 3D chain that you can add and remove links without any effort, then jump into Cinema 4D and follow along.
TLDR:
- Splines
- Sweep
- Cloner
- Path
Start out with the basic shapes
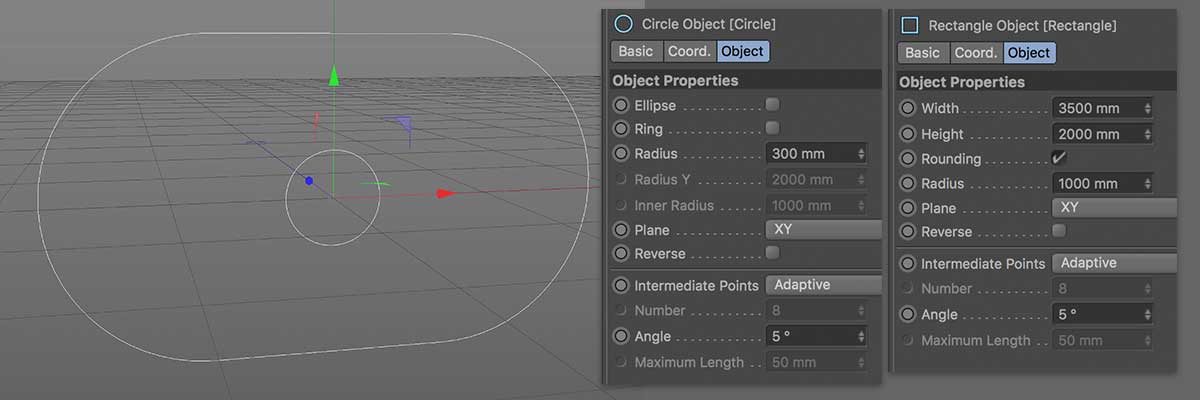
First up, we need to get the two shapes that make up a chain link. Grab a circle and a rectangle spline (Create>Spline>Circle and Create>Spline>Rectangle).
Shrink down your circle to a size that will be the thickness of the link. Next, increase the width of the rectangle, check the Rounding box, then increase it’s radius so that the arcs are touching on the rectangles shortest sides.

Spline shapes in Cinema 4d
Making the first link
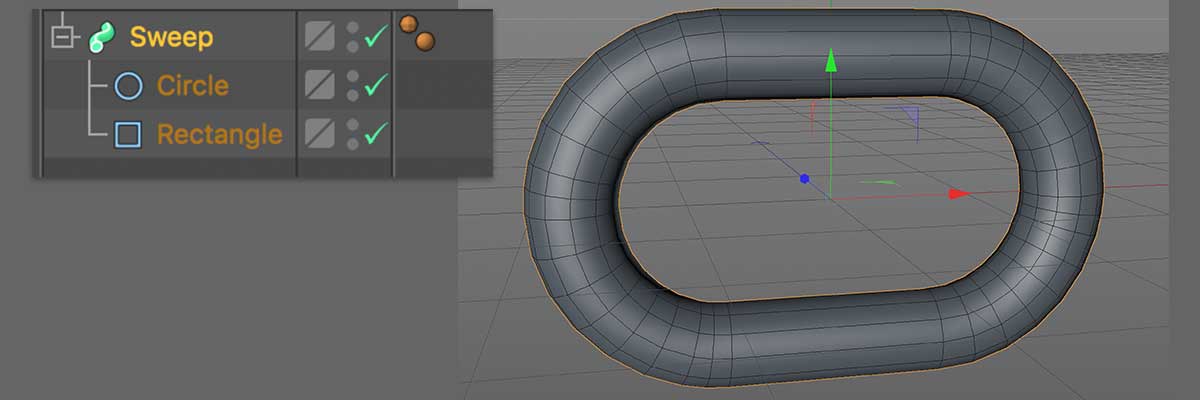
The next step is to setup the circle so that it will be extruded around the path of the rectangle. Grab a Sweep (Create>Generators>Sweep) and place the Circle and the Rectangle inside as children. Basically the Sweep, sweeps the first shape around the second shape so if the result is something weird, just swap the shapes around.
At this point you can adjust each shapes Angle setting to reduce or increase the poly count as desired.

Path sweep in Cinema 4d
Adding more links
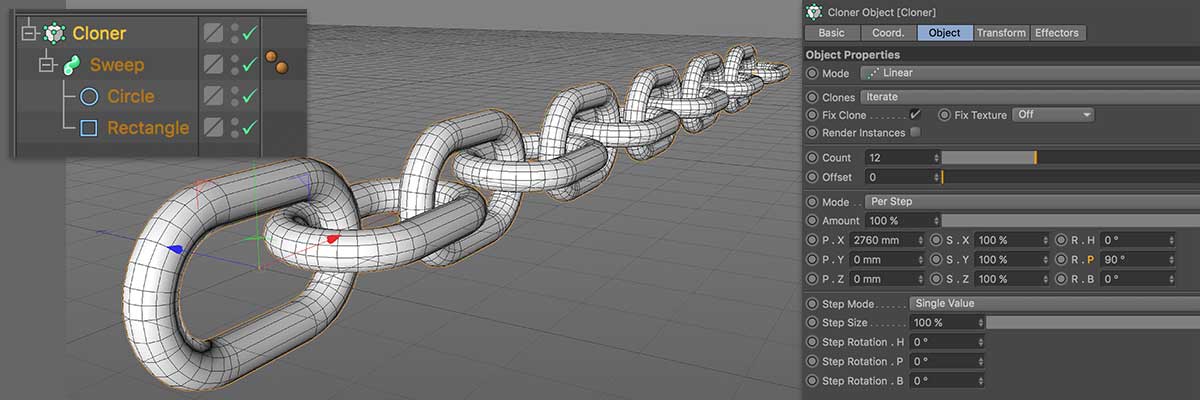
You could simply duplicate and rotate the link to create a chain but using a Cloner is a better way. Grab a Cloner (Select the Sweep, Hold ALT/OPT and click MoGraph>Cloner) With the Sweep as a child to the Cloner, you should see 2 duplicates appear on the Y axis by default. We need to play with the Cloners Object settings to change the direction and to rotate each link. Under the Object tab, look for the translation boxes, zero out the Y position and increase the X position so that the links are just overlapping. Move over to the P Rotation and set that to 90. Now if you increase the cloner count, each new link will follow these new rules.
The great thing about this method is that if you want to increase the thickness of the chain, simply click on the Circle Spline and scale up. This will affect all of the links so you don’t have to each one individually. You can also vary up the chain by playing with the Cloners step rotation.

Cloner in Cinema 4d
Following a path
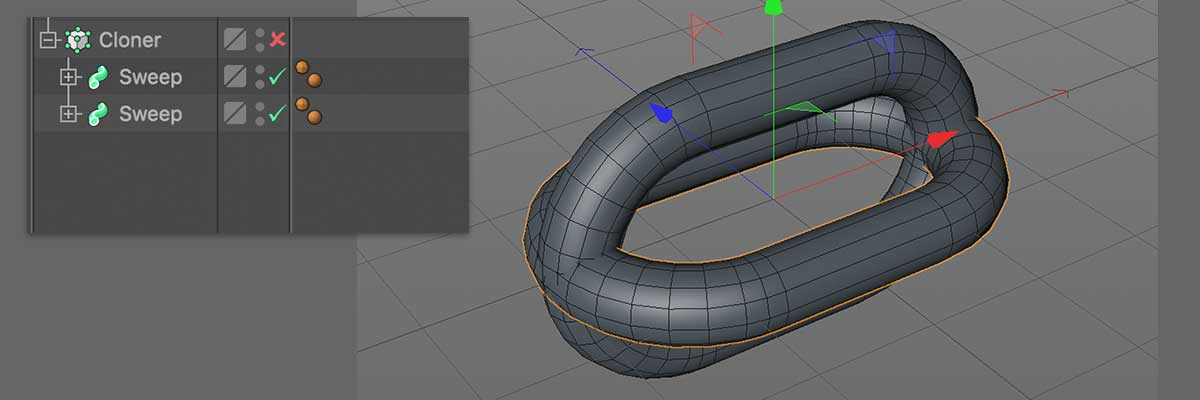
To get the chain to follow a path but still keep the none destructive workflow, we have to go back a few steps and create a 2nd link. Cross the Cloner so you can just see the Sweep then duplicate it (Select the Sweep in the Objects List Menu, hold down Command/Ctrl and click and drag to duplicate keeping the new Sweep as a child). With the new link created, change its Rectangle Plane from XY to XZ. Now when the Cloner clones, it will alternate between the 2 Sweeps. If you had a list of several objects in the Cloner, the new clone will be whichever the next step in the list is.

Cloner Object in Cinema 4d
The chain will follow a path so we need to make that. This can be one of the default shapes under the Create>Spline menu or you draw one out with the pen tool or even import a shape from illustrator. For this example I am going to use the Helix and it needs to be quite large so scale it up.
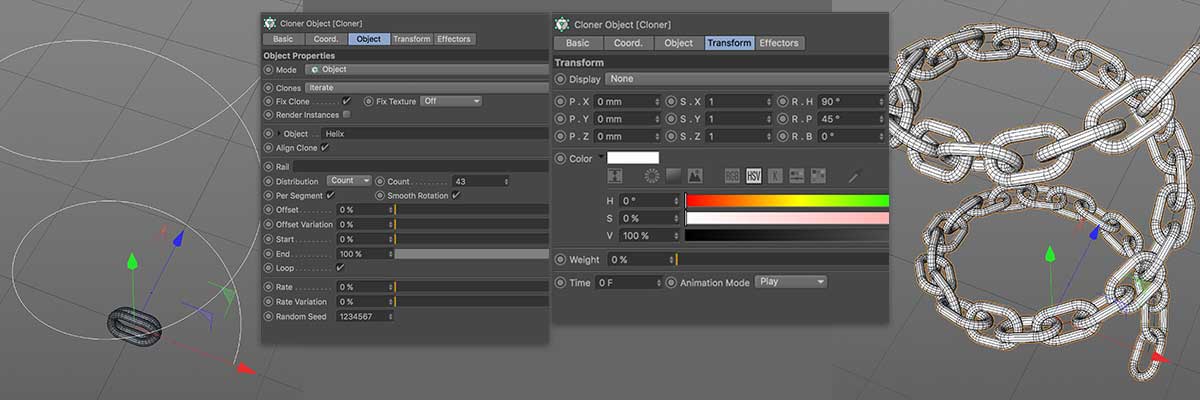
Now we need to adjust some of the settings of the Cloner. Turn back on the the Cloner and change the Mode from Linear to Object. Doing this will wipe what you done in the previous step but thats not a big deal. With the Cloner still selected, drag your newly created path from the Object List Menu into the empty object box of the Cloner. Your Cloner should now spread the chain links along the path. Increasing the count will fill in the gaps but you might have an orientation problem. To fix this, move from the Object tab to the Transform tab and add 90 to the Rotation H box. I also added 45 to the Rotation P just so that the links are slightly rotated.

Path follow in Cinema 4d
You can also give a bit of variance by adding a Random Effector (Select the Cloner then MoGraph>Effector>Random). Turn off the Position and turn on the Rotation with 15 in the Rotation P. Hopefully that worked and now you have a chain link along a path.
Where to from here?
From here you can do things like:
- Adding Dynamic Tags and have the chain fall but keeping it connected.
- Animating the Cloners Offset so that it can complete the loop with a lock. If you do this make sure you check the Smooth Rotation box so it doesn’t step.
- Or you can switch out the Helix path for some text and make a sweet logo render image.
